


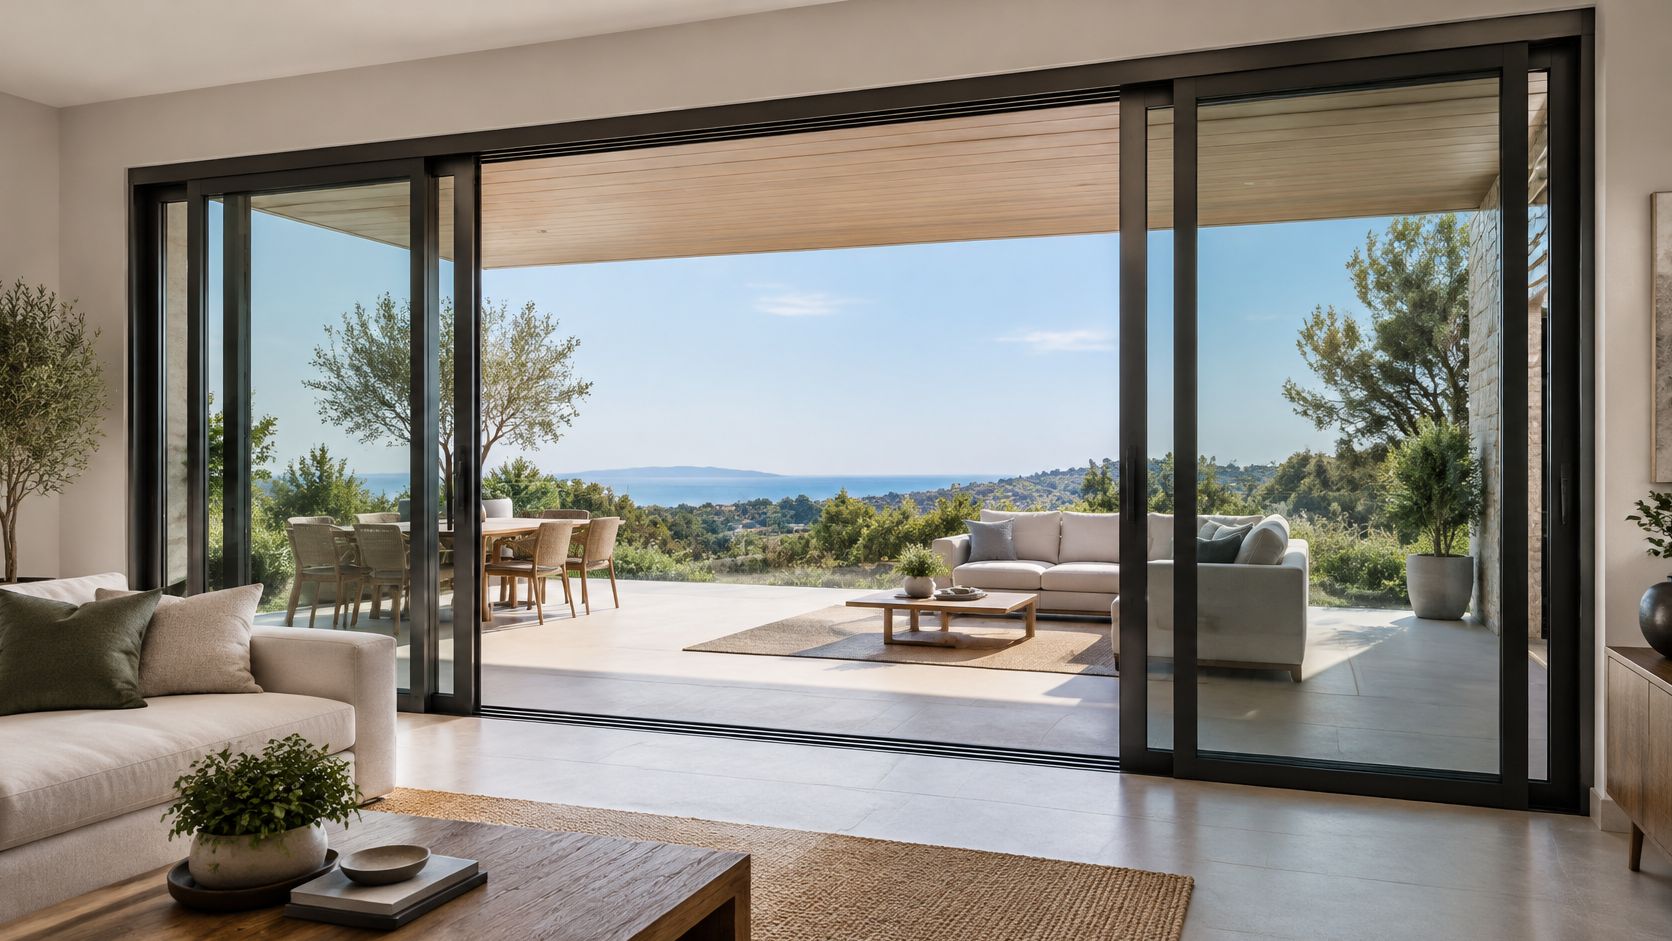
Multi Panel Sliding Doors: Layouts, Tracks and Specs
You're looking at a wall between your living room and patio, trying to work out how much glass you can fit and where the panels will go when you open them. The drawings look simple: slim frames, a broad view, and an almost continuous floor. The difficult decisions sit underneath that picture, especially the track, sill, drainage, and structure.
Multi panel sliding doors should be selected as complete opening systems, not just collections of glass panels. A wider door isn't automatically a better door. Start with the opening you need, then make sure the proposed assembly can carry its loads, drain water, and operate reliably in your site's exposure.
Table of Contents
- Multi Panel Sliding Door Layouts by Panel Count
- Track and Pocket Options Compared
- Structural Limits and Wind-Driven Water Risk
- Frame Materials and Thermal Targets for Your Climate
- How to Install a Large Multi Panel Sliding Door
- Confirm the Specs Before You Order
Multi Panel Sliding Door Layouts by Panel Count
Ask a showroom for a multi panel sliding door and the first question back is usually how many panels you want. That question comes too early. Count panels after you know the clear opening you need and where the glass will sit when everything is open.
The FGIA market analysis reported by Door and Window Market Magazine defined large-format doors as openings larger than 8 feet by 8 feet serving entry or patio applications, put multi-slide systems at 35% of that market in 2019 against 21% for folding or hinged systems, and described most installations as 10–20 feet wide with two to five panels, with 10–12-panel systems buildable but rarely specified.
Treat those as market observations, not limits. A common opening width says nothing about the maximum panel size your frame can carry.
Match the layout to the usable opening
Multi panel sliding door layouts and typical widths
| Layout | Panels | Typical overall width | How the panels operate | Best fit |
|---|---|---|---|---|
| Two-panel, one operable | Two | Narrow end of the common band | One panel slides across a fixed panel | Conventional patio openings |
| Three-panel, two operable | Three | Middle of the common band | Operable panels telescope toward a fixed end panel | Living rooms needing a broad opening |
| Four-panel, paired stacking | Four | Middle to upper end of the common band | Panels separate at the center and stack toward the ends | Large indoor-outdoor spans |
| Five-panel, sequential | Five | Upper end of the common band | Several sliders travel on parallel tracks | Wide residential openings and commercial frontage |
| Six to twelve panels, custom | Six to twelve | Beyond the common band, engineered per project | Tracks, interlocks, and parking are coordinated together | Custom commercial or unusually wide openings |
Panel count alone doesn't establish an acceptable opening width. Height, glass weight, wind pressure, and the manufacturer's tested configuration all set the actual limit. The published rating applies to the exact assembly that was tested, so swapping a fixed panel for an operable one, or adding a panel to widen the opening, can move you outside the tested arrangement. More panels also means more meeting stiles, and every joint is another line the sill and interlocks have to keep dry on an exposed site.
Fixed panels generally simplify hardware and reduce cost compared with making every panel operable. They ease restraint and sealing at that edge, but they don't replace structural engineering. A central fixed panel isn't interchangeable with a fixed end panel, either: draw the actual travel arrows before approving the layout.
Practical rule: Choose the clear passage you need, not the largest panel count that fits on an elevation.
Measure the available opening first. Then decide how much must open for circulation, furniture movement, and entertaining. Finally, ask the manufacturer to reconcile that clear opening with its approved panel dimensions and parking arrangement.
Track and Pocket Options Compared
Side-stacking panels behave like a deck of cards gathered into an overlapping pile. Pocketing panels are more like books pushed into a cabinet: the stack still exists, but the wall conceals it.
That distinction matters more than the marketing name. Every moving panel needs both a travel path and a parking position. If neither appears on the floor plan, the design isn't resolved.
Track support also changes the building requirements. In a bottom-rolling system, sill-mounted rollers carry panel weight. In a top-hung system, carriers transfer that weight into the overhead support, while the lower guide restrains movement.
The visible hardware helps identify those different support arrangements.
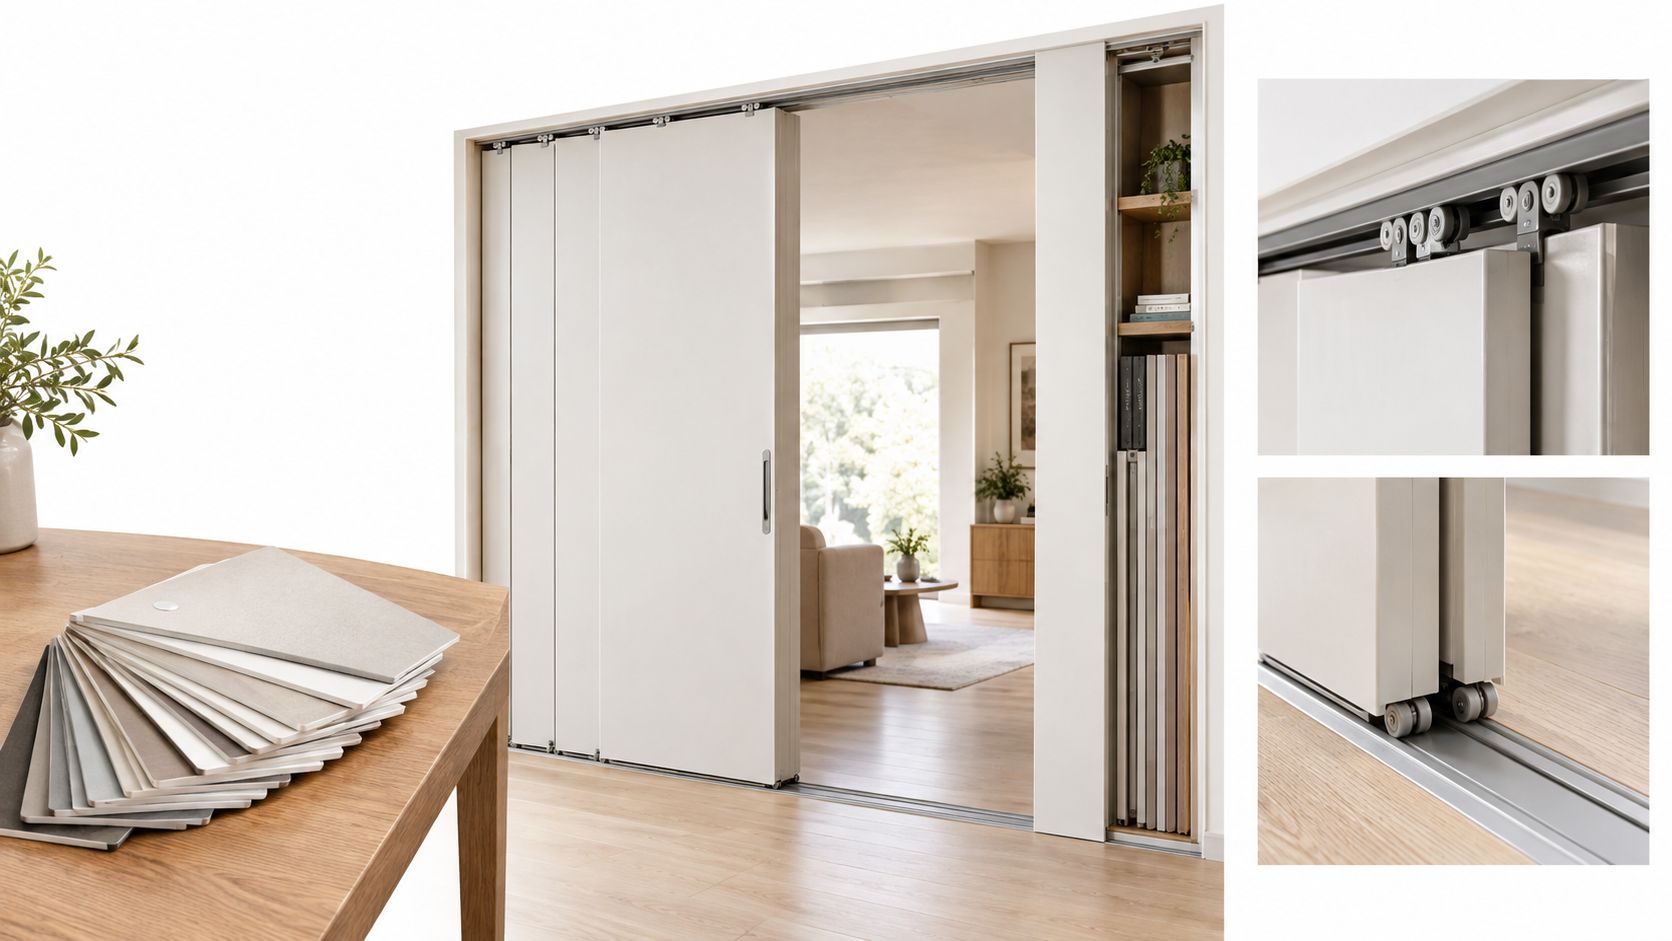
Compare parking space, not just opening width
| Option | Where panels park | Wall space needed | Best for | Trade-off |
|---|---|---|---|---|
| Side-stacking | In an overlapping stack at either end | Stack footprint within the opening, or adjacent wall length if panels travel beyond it | Residential patios | Parked glass can remain in the sightline |
| Inside a wall cavity | Pocket length for panel travel and cavity depth for the complete stack | Concealed-panel openings | More involved framing, drainage, and service access | |
| Corner stack | Along perpendicular returns in a purpose-designed system | Clear parking and travel space at the corner | Corner living spaces | Engineered corner connections and track ends |
| Overlapping track | On staggered parallel tracks within the frame | Little adjacent wall space, but sufficient sill depth | Openings constrained by nearby walls | Parked panels reduce clear passage |
Don't assume side-stacking requires adjacent wall length equal to the sum of every panel width. Panels on separate tracks overlap, so the parked footprint is governed by panel width, track offsets, handles, and stops. A system that sends panels beyond the opening needs additional wall space, but that's a different arrangement.
Similarly, corner sliding doors don't necessarily fold. A retained corner post and a post-free opening require different structural solutions. Ask which condition the quotation includes.
Pocketing needs an accessible drainage detail
Pocketing can produce the cleanest open view, but it also conceals parts you may eventually need to inspect. Require a section showing the cavity, track, flashing, drainage outlet, and access to serviceable hardware.
For early renovation allowances, SouthRay Kitchen & Bath's guide to pocket door budgeting with SouthRay can help organize the framing and wall-work questions. Treat exterior multi-slide pricing separately, since weatherproofing and large-panel hardware need a project-specific quotation.
Measure the available returns before choosing the mechanism. Mark the parked panels on the floor plan, including handles and screen housings. Then check the view from the seating position, not just from the center of the room.
Structural Limits and Wind-Driven Water Risk
A door can look beautifully aligned while the building is unfinished, then become difficult to operate after loading, settlement, or weather exposure. The frame needs adequate support, but it also needs to accommodate the movement anticipated by the project engineer.
The building structure and the door frame have different jobs. The structural header carries the construction above the opening. The door frame holds its panels, maintains interlock geometry, and transfers its specified loads through the approved anchors.
Follow the load path
For a bottom-rolling assembly, the panel dead load reaches the supporting substrate through the sill. For a top-hung assembly, it reaches the overhead structure through the carriers and track. Wind loads travel through the glass, panel frames, interlocks, perimeter frame, and anchors into the building.
The component diagram provides a useful orientation, but the actual load path must follow the selected support system.
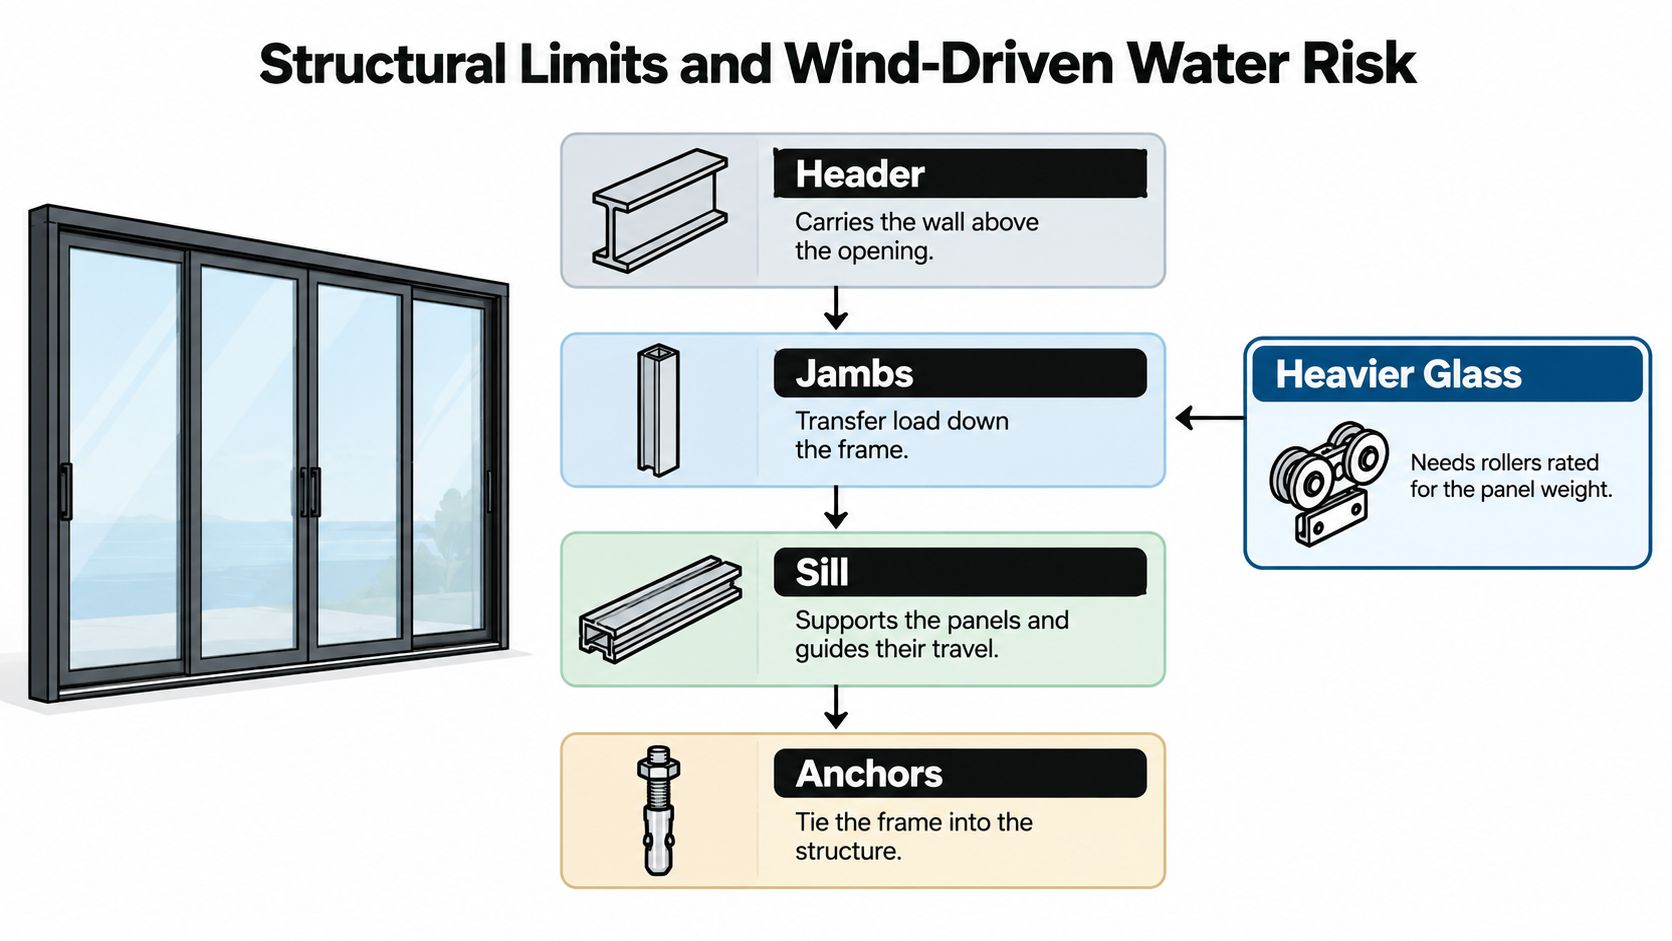
Heavier glass changes more than lifting logistics. The manufacturer must match the roller or carrier capacity, panel frame, track, and connections to the finished panel weight. Specifying stronger rollers alone won't correct an inadequately supported sill.
A structural engineer should size the replacement header before the door is ordered when a project removes a load-bearing wall. The engineer and door supplier also need to coordinate anticipated header movement and the attachment detail. Tightening the door frame against a deflecting beam can transfer movement into an assembly that wasn't designed to carry it.
Deflection changes the seal geometry
A long sill can look straight while bridging an unsupported depression underneath. Once loaded, it may settle locally, changing roller engagement and the alignment of meeting stiles.
Frame movement can produce several symptoms:
- Uneven closing gaps: Interlocks engage differently from top to bottom.
- Changing operating force: Panels roll freely in one area and drag in another.
- Local seal loss: Gaskets stop contacting their mating surfaces consistently.
- Drainage problems: Water collects where a sill has settled or been installed out of its intended plane.
Don't accept extra sealant as the first response to these symptoms. Check support, frame geometry, panel adjustment, and drainage before deciding that a joint needs resealing.
A tested arrangement has boundaries
FGIA's AAMA 517-25 specification, described by Metal Construction News, addresses air penetration, water penetration, and structural-load performance for multi-track doors and windows, with testing tied to panel size and the interlocking conditions represented by the sample.
That connection between test specimen and supplied product is critical. A report for a shorter assembly or a different interlock arrangement doesn't automatically qualify the proposed opening. Ask the manufacturer to identify the engineering documentation that permits any extension beyond the tested configuration.
Separate the requirements on the submittal:
- Design pressure: The project's required structural resistance.
- Water-test pressure and method: The conditions used to evaluate water penetration.
- Permitted dimensions: The supported panel sizes and assembly arrangements.
- Anchorage: Fasteners, spacing, embedment, edge distances, and substrate.
- Impact protection: The applicable classification and approved configuration where required.
For hurricane-zone projects, have the design professional verify the applicable approval and labeling requirements against the actual product documents. The impact-resistant sliding glass door guide can help frame the product questions, but an impact designation shouldn't substitute for checking water resistance and installation conditions.
Storm exposure is more complex than a headline rating
A Florida Building Commission review found that conventional protocols may inadequately represent hurricane wind-driven rain and cited 2024 research showing significant intrusion below current design levels, influenced by wind direction, wind speed, test duration, and shutters.
That doesn't make laboratory testing unhelpful. It means a test result must be considered alongside the site: exposure, overhangs, adjacent walls, roof runoff, exterior paving, and the route water takes away from the threshold.
A strong product rating doesn't waterproof the junction between the door and the building.
Pay particular attention to the connection between the door and sub-sill, the sub-sill end dams, jamb transitions, and operable-to-fixed panel junctions. These details must form a continuous water-management system rather than isolated beads of sealant.
Engineer the sill as a drainage assembly
A sill detail should show where incidental water is collected, where it exits, and what prevents it from reaching the interior or escaping sideways into the wall. End dams, a back dam where specified, and connected flashing transitions need to be visible on the drawings.
A recessed threshold requires especially careful coordination. Lowering the track for a flush appearance changes its relationship to paving, drains, waterproofing, and finished floors. Don't approve that recess from an architectural section alone.
Ask who supplies the pan, who waterproofs the recess, and who verifies the outlet before finishes conceal it. Assign those responsibilities before installation, not after someone finds a wet floor.
Frame Materials and Thermal Targets for Your Climate
Start with a documented thermal target, then compare frame materials. U-factor measures heat flow through an assembly, with lower values indicating better insulation. Air leakage describes air passing through the closed product under a stated test condition, not its resistance to liquid water.
The following regional figures appear in the ENERGY STAR Version 7 draft specification: maximum U-factors of 0.22 for northern, 0.24 for north-central, 0.28 for south-central, and 0.32 for southern regions, with sliding-door air leakage limited to 0.3 cfm/ft², compared with 0.5 cfm/ft² for swinging doors. Because this is a draft document, use the table as a discussion benchmark, not proof of current certification or the applicable door classification.
| Climate region | Max U-factor in cited draft | Max sliding-door air leakage |
|---|---|---|
| Northern | 0.22 | 0.3 cfm/ft² |
| North-central | 0.24 | 0.3 cfm/ft² |
| South-central | 0.28 | 0.3 cfm/ft² |
| Southern | 0.32 | 0.3 cfm/ft² |
Compare the whole product
Request the whole-product NFRC U-factor, not a center-of-glass value. The ENERGY STAR residential window, door, and skylight specification provides a product-rating framework; the submitted door still needs to match the applicable classification and project requirements.
The frame, spacers, panel edges, and glazing all contribute to whole-product performance. Don't assume a narrow configuration represents a much wider arrangement with different interlocks or glazing.
Match the certification documentation to the proposed assembly, then check solar heat gain against orientation and shading. A glass package suitable for a shaded elevation may be uncomfortable on an exposed afternoon-facing wall.
Choose materials by the complete assembly
Thermally broken steel can provide slender sightlines and stiffness, but its thermal result depends on the actual profile and glazing package. Thermally broken aluminum offers a lighter framing material, yet it still needs adequate section stiffness, hardware capacity, and suitable finishes.
Wood-clad systems provide a warmer interior appearance. Their trade-off is moisture-sensitive detailing and finish maintenance, particularly around exposed lower edges.
For glass selection, compare double versus triple glazing alongside panel weight and operating hardware, not insulation alone. For an existing installation with fogging between panes, Pine Country Window Cleaning's explanation of when insulated glass units need replacement helps distinguish a sealed-glass problem from condensation on an accessible surface.
Choose the frame and glass together. More glass doesn't automatically improve insulation, and slimmer metal doesn't automatically produce a better whole-product rating.
How to Install a Large Multi Panel Sliding Door
Installation determines whether the supplied assembly can perform as intended. This is specialist work: arrange suitable lifting equipment, trained installers, and an exclusion area before unpacking large glazed panels.
Use the installation overview to coordinate the sequence, then follow the product-specific shop drawings for the actual connections and seals.
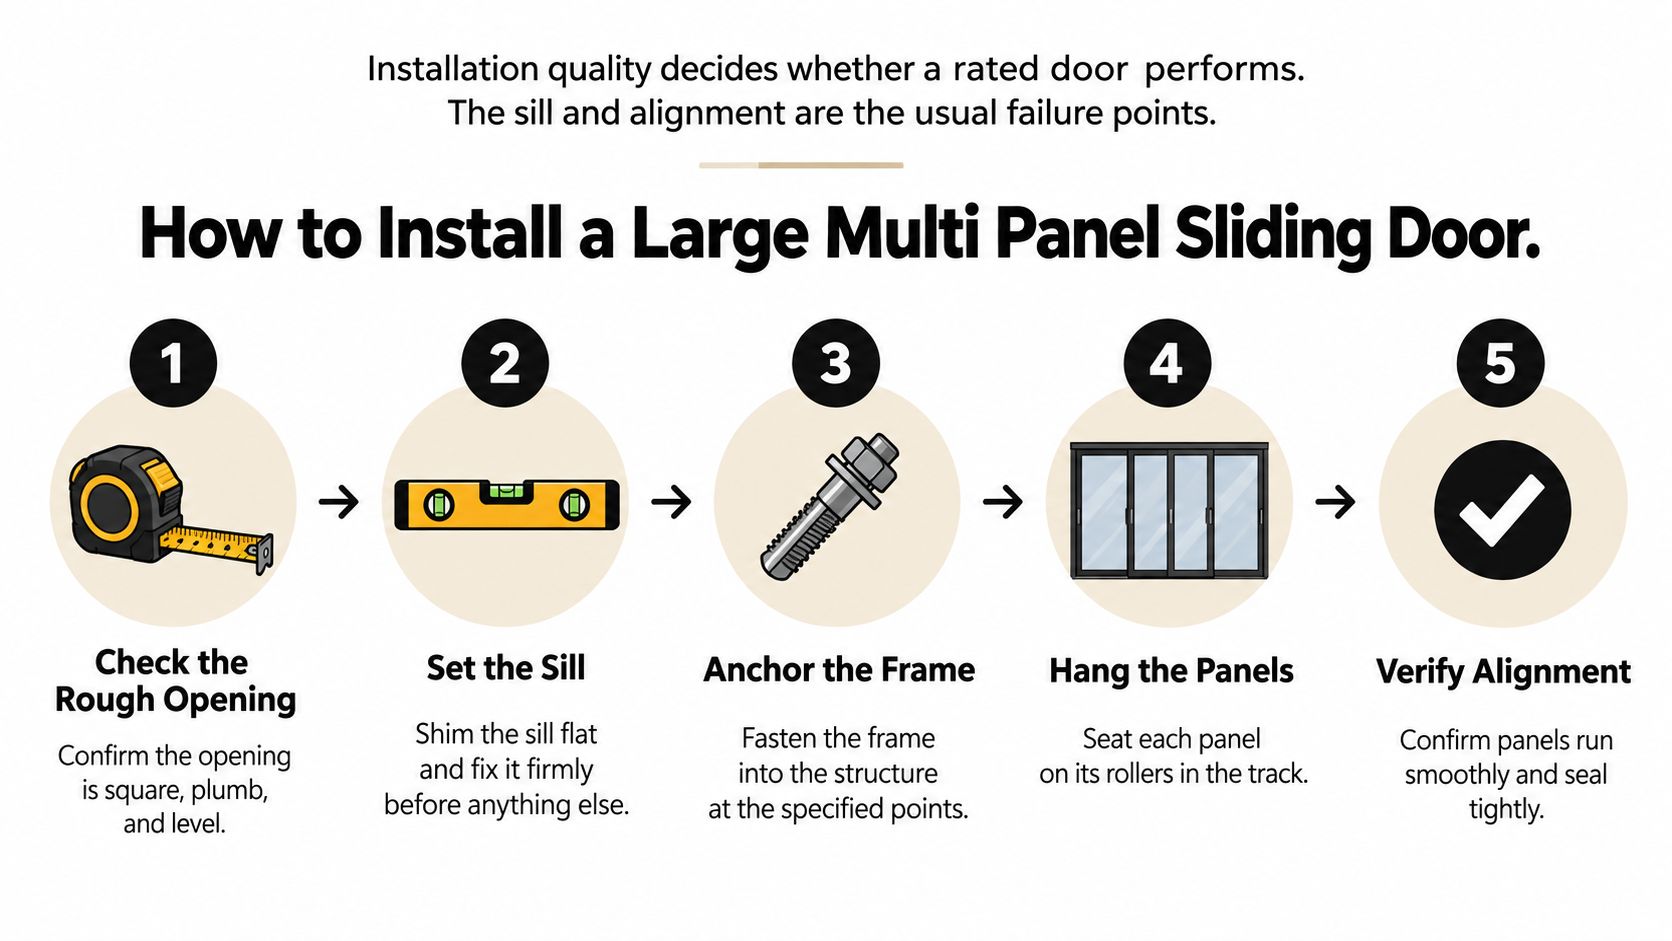
Prepare, support, and align the assembly
Survey the rough opening. Use a laser level, straightedge, and diagonal measurements to check dimensions, square, plumb, and level against the shop drawings. Don't use roller adjustment to compensate for an opening that needs structural correction.
Verify the support and anchor plan. Confirm the header, substrate, fixing locations, and lifting sequence before moving the frame into position. Missing backing discovered during installation often leads to improvised connections that haven't been approved.
Install the sill pan and transitions. Form the specified outward drainage path, end dams, and connections to adjacent waterproofing. A pan with an open corner can direct collected water into the wall instead of outside.
Set and support the sill. Check the track with a straightedge and provide the continuous support or designated bearing points required by the system. Don't confuse a sloping drainage pan with a rolling track, which must retain its specified geometry.
Anchor without distorting the frame. Shim at approved locations and fasten into the designated structure. Overtightened anchors can bow a jamb, narrow the operating clearance, and prevent proper lock engagement.
Install panels in the prescribed order. Seat the rollers or carriers correctly, adjust panel height, and check meeting-stile alignment throughout travel. Fit anti-lift devices and stops before releasing the opening for use.
Complete flashing and compatible sealant joints. Integrate head and jamb flashing with the wall's drainage plane, using the specified backer rod, primer, and sealant where required. Keep drainage slots and weeps open.
Commission before concealing the work. Check operating force, locks, panel engagement, and drainage, then conduct the agreed water check while interior junctions remain visible. A controlled hose check can identify installation leaks, but it doesn't replace a specified pressure-based field test.
The installation video can help the project team visualize handling and assembly. Use it alongside, not instead of, the instructions for the purchased system.
Record the concealed work
Photograph the sill support, pan corners, anchors, and flashing before trim covers them. Record adjustments and any corrective work in the handover documents.
Before sign-off: Operate every panel yourself and inspect the accessible drainage outlets. Don't accept smooth movement only with the locks disengaged or the seals loosened.
Confirm the Specs Before You Order
The same overall width can conceal very different performance. Compare complete submittals, not a rendering from one supplier against a laboratory report from another.
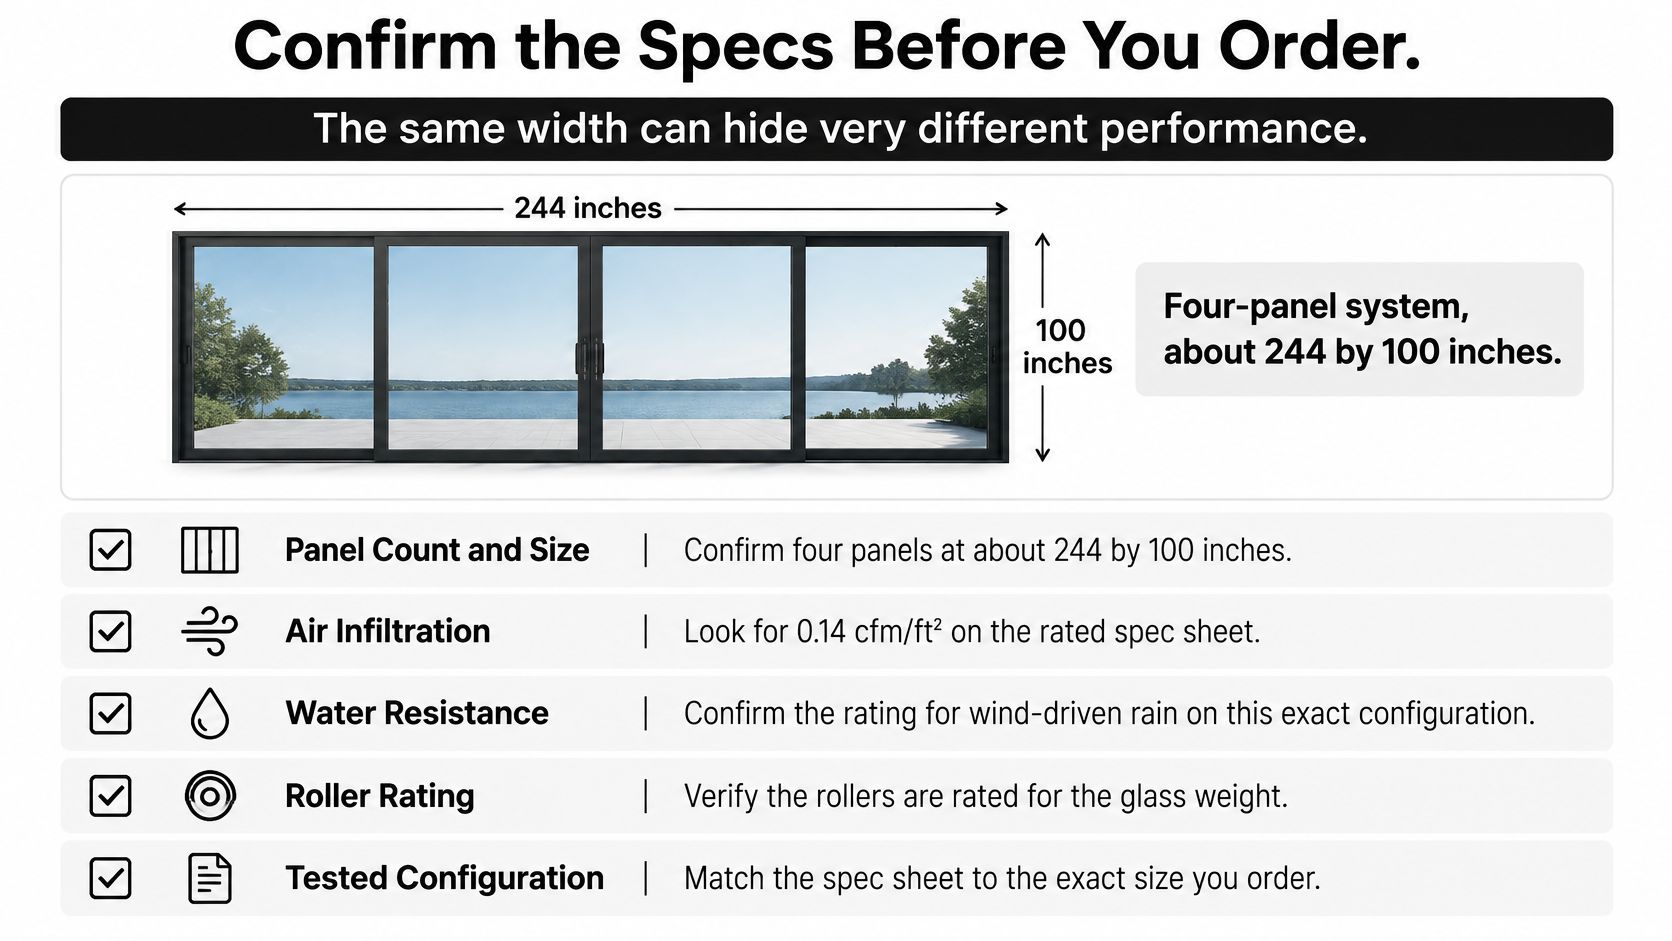
For example, Solar Innovations' sliding-door specification reports a roughly 244-by-100-inch, four-panel system with air infiltration of 0.14 cfm/ft² at 1.57 psf and water testing at 12.0 psf, alongside another air result of 0.10 cfm/ft² under the same pressure condition. Those figures are useful only when you identify the associated specimen, configuration, test method, and installation.
The following visual is a reminder to match the documents to the order, not a universal performance target.
Require a coordinated submittal
Ask each supplier to complete the same checklist:
- Configuration and dimensions: Overall frame size, panel sizes, travel arrows, and clear opening.
- Air performance: Leakage result, test pressure, standard, and represented assembly.
- Water resistance: Test pressure, method, sill option, and relevant installation conditions.
- Structural capacity: Design pressure, permitted dimensions, anchors, and substrate requirements.
- Thermal construction: Thermal-break arrangement, whole-product rating, glass coating, and spacer.
- Drainage details: Sill sections, end dams, outlet locations, and waterproofing interfaces.
- Weight and hardware: Finished panel weight, roller or carrier rating, and documented cycle testing.
- Accessibility and service: Threshold geometry, operating force, replaceable parts, and maintenance access.
- Installation verification: Approved instructions, inspection responsibilities, and required field testing.
If you're coordinating multiple drawing packages, Trail Star Development's guide to interpreting floor plans and finish schedules helps identify where dimensions, materials, and installation information should agree. Don't let a finish schedule override the sill assembly shown in the approved shop drawings.
Resolve substitutions before fabrication
One supplier may offer the preferred sightline while another provides a better-documented arrangement for the exposure. I would choose the supported assembly over an attractive configuration whose performance relies on assumptions.
For nonstandard openings, use the custom patio door sizing guide to organize the initial dimensions. Distinguish rough opening, frame size, and finished clear passage so the quotation doesn't solve the wrong measurement.
Send the exact width, height, desired panel count, climate zone, and exposure description with your enquiry. Require whole-opening performance documentation and coordinated shop drawings before authorizing fabrication.
Black Badge Doors offers made-to-order steel and aluminum door systems, including thermally broken options and impact-rated aluminum configurations for applicable Florida and Miami-Dade projects. Visit Black Badge Doors with your opening dimensions, preferred layout, and site exposure to request a configuration review, technical documentation, and a project-specific quotation.
Read more

Aluminum Windows Colors: A Finish and Standards Guide
Picking a frame color from a swatch book is the most common advice in showrooms, and it's the least useful. A swatch tells you how black, bronze, or white looks under store lighting. It tells...
Read more
Four Panel Bi Fold Door Guide: Layouts, Sizes and Specs
Choosing the slimmest frame first is popular advice for a four panel bi fold door. It's also the wrong starting point. A beautiful elevation won't tell you whether the folded leaves block a kitchen counter,...
Read more